How To
Before the Basics
How To Do Basics Calculations
How To Use Parenthesizes
How To Move Bubbles
How To Label a Bubble
Gestures in Oovium
How To Use the If-Then-Else Function
How To Use the Summation Function
How To Work With Aethers
How To Work With Mechs
How To Work With Grids
How to Create Mind Maps
How To Work With Dropbox
Tips and Tricks
Recursive Mechs
Before the Basics
VIDEO
How To Do Basic Calculations
VIDEO
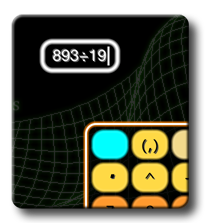
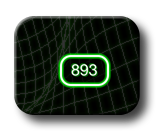
(1a) double tap anywhere on the background
(1b) type 893 ÷ 19
(1c) hit the '=' key. (or re-tap the bubble)
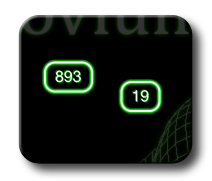
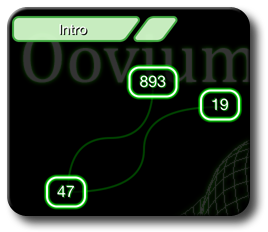
(2a) create two separate bubbles one with 893 and one with 19.
(2b) double tap to create a 3rd bubble
(2c) tap the 893 bubble
(2d) tap the ÷ key on the keypad
(2e) tap the 19 bubble
How To Use Parenthesizes
VIDEO
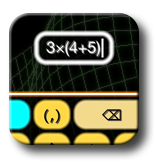
(3a) Open a new bubble and type 3×(4+5)=
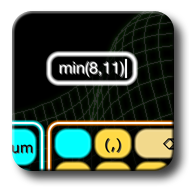
(4a) Evaluate the expression min(8,11)
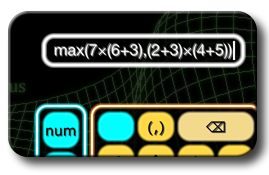
(5a) Try: max(7×(6+3),(2+3)×(4+5))
How To Move Bubbles
Anchoring
anchoring . Normally, sliding one's finger across Oovium will simply cause the aether to slide. Anchoring is holding the aether still with one finger while doing something else with another.
Moving Bubbles Individually
Moving Multiple Bubbles
How To Label a Bubble
VIDEO
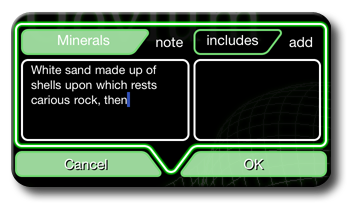
In example 6, we will simply label a bubble and then reference that bubble from another expression.
(6a) Create a bubble and type 893=
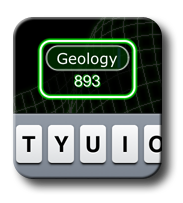
(6b) Anchor+tap the bubble to bring up the context menu for that bubble
Anchoring is an important class of gestures in Oovium. It means holding the aether still with one finger while doing something else with another; in this case tapping a bubble. Anchor+tapping on any bubble in Oovium will bring up a context menu for that bubble. This is similar to clicking the right mouse key on something on a normal computer. In this case we are interested in the 'label' key.
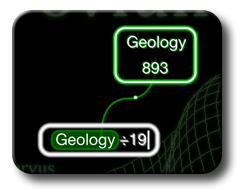
(6c) Hit the 'label' key in order to bring up the label text box. Type 'Geology' into the text box and hit return to save it
(6d) Now create a 2nd bubble. Click the first bubble, then type ÷19=
Gestures in Oovium
VIDEO
MOVE BUBBLE [Anchor+Drag:bubble]
CONTEXT MENU [Anchor+Tap:bubble]
LASSO [Anchor+Drag:aether]
MOVE CURSOR [Anchor+Tap:expression]
How To Use the If-Then-Else Function
VIDEO
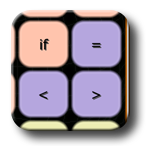
if function allows users to create conditional calculations. The function takes 3 parameters: condition, then, else; i.e, if(condition ,then ,else ).
if(3=4,5,6) , which would evaluate to 6 since 3 is not equal to 4.
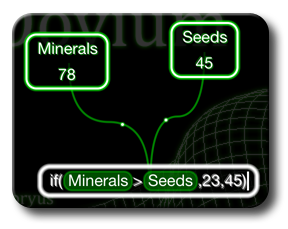
(7a) Create two bubbles, one set to 78, the other set to 45.
(7b) Label the 78 bubble Minerals and label the 45 bubble Seeds.
(7c) Create a 3rd bubble and tap the 'if' function located on the 'mis' tab.
(7d) Now click the Minerals bubble, followed by the greater than sign also located on the 'mis' tab and then tap the Seeds bubble.
(7e) Finally, type: ,23,45) at the end.
How To Use the Summation Function
VIDEO
start value ,end value ,expression )
i , Oovium uses k as the iteration variable.
start value - is a number indicating the initial value for k.
end value - is a number indicating the final value for k.
expression - is the function to be summed over.
number datatype. Currently, Oovium has 4 native datatypes: number , complex , vector and function .
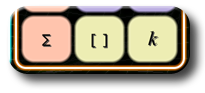
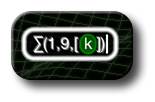
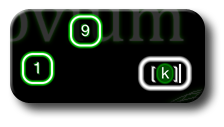
function type one embeds the expression in brackets using the [] key. Let's try a simple example. In example 8, we wish to calculate the sum of the numbers 1 through 9.
(8a) Create a new bubble and type: ∑(1,9,[k])
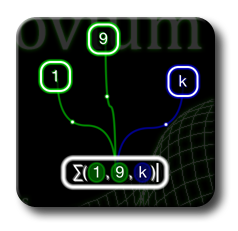
(9a) Create two bubbles, one equal to 1 and the other equal to 9.
(9b) Create a third bubble, and type: [k]
(9c) Create a fourth bubble, compositing the other 3 bubbles as parameters of the ∑ function.
start value ,condition ,expression )
start value - is a number indicating the initial value for k.
condition - is a function indicating the conditions under which to continue iterating.
expression - is the function to be summed over.
(10a) Create a new bubble and type: ∑(1,[k<10],[k])
How To Work With Aethers
Dropbox article for more information about uploading and downloading aethers to your dropbox.
How To Work With Mechs
VIDEO
mech . The mech is a type of bubble that allows a user to define their own function. These functions can then be used in instance bubbles just like any of the built-in functions.
CENTS MECH (11a) Find the bubble toolbar in the upper right hand corner. Click the toolbar to expand it. Select the mech tool.
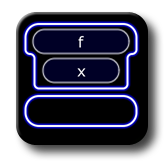
(11b) Double tap on the aether to create the mech bubble.
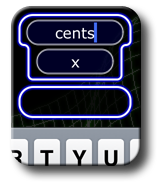
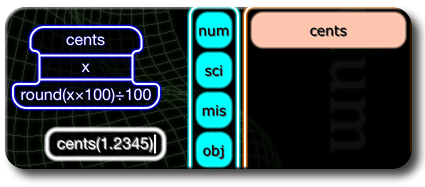
(11c) Tap into the function name text field and change the name from 'f' to 'cents'
(11d) Tap the bottom of the mech bubble in order to activate the result area.
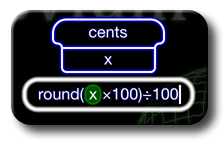
(11e) Input the 'round(' function from the mis tab. Then tap the parameter x above from the mech bubble. Then finish with: ×100)÷100=
(11f) Create a new instance bubble. Go to the cus tab and select our new function 'cents'. Then enter: 1.2345)=
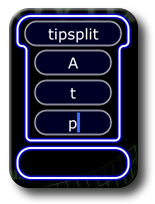
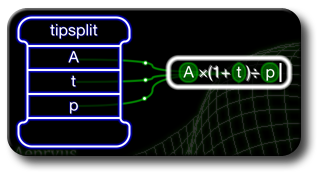
TIPSPLIT MECH (12a) Create a new mech. Change the name to 'tipsplit'. Add two more parameters. Change the parameters to A, t and p. Hit the OK button.
(12b) Create a new instance bubble. Tapping the parameters on the mech when needed enter the following: A×(1+t)÷p
(12c) Tap the bottom of the mech bubble in order to activate the result area. By either tapping the top of the bubble directly or by picking it off
(12d) Create a new instance bubble and input: tipsplit(35.89,.18,3)=
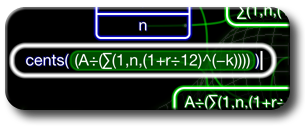
PAYMENT MECH ∑ function in order to create the useful payment function. This function will calculate the monthly payment for a loan given the amount of the loan, the interest rate and the number of months. (It assumes monthly compounding)
Summation article, perhaps, this would be a good time to do so.
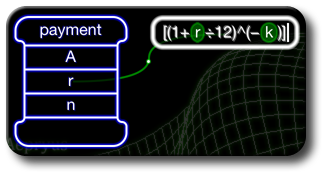
(13a) Create a new mech; name it 'payment'. Add two more parameters; name the parameters A, r and n.
(13b) Create a new instance bubble. Type: [(1+r÷12)^(-k)]=
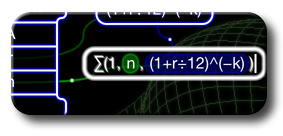
(13c) Create a new instance bubble. Type: ∑(1,n,
(13d) Create a new instance bubble. Divide the input amount, A by the our last instance bubble.
(13e) Tap the result area of the payment mech. Input the cents function and pass the result of our last bubble into it.
(13f) Create a new instance bubble and input: payment(10000,.05,36)=
How To Work With Grids
VIDEO
How to Create Mind Maps
VIDEO
How To Work With Dropbox
VIDEO
Tips and Tricks
VIDEO
Recursive Mechs
VIDEO © 2015 Aepryus Software, Inc.

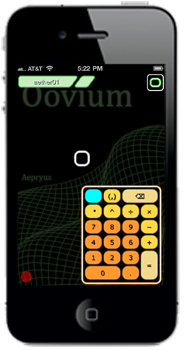 When one first boots into Oovium they are (approximately) presented with a blank black screen. The first obvious question is: hunh?!
 Now, all that's left to do is get the answer. This can be done by either hitting the '=' key or by simply re-tapping the bubble. Which, if everything goes well, should be 47.

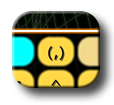 Among Oovium's innovations and quirks is its magical parenthesizes key. This key has been the source of some confusion, but hopefully through this little tutorial we can clear that up. They key is located on the main number keypad and is labeled like this: (,)

 The if function allows users to create conditional calculations. The function takes 3 parameters: condition, then, else; i.e, if(condition,then,else).
 (7a) Create two bubbles, one set to 78, the other set to 45.
 One of the functions on the 'mis' page is the ∑ function, known as the summation function. This function is quite powerful, but perhaps not as intuitive as other functions. It allows a user to iterate an expression over a range of values, returning the sum of all those values.
 expression - is the function to be summed over.
 How To Work With Aethers

 Tap the OK button to save your changes.

 (11d) Tap the bottom of the mech bubble in order to activate the result area.
 (11f) Create a new instance bubble. Go to the cus tab and select our new function 'cents'. Then enter: 1.2345)=
 (12b) Create a new instance bubble. Tapping the parameters on the mech when needed enter the following: A×(1+t)÷p
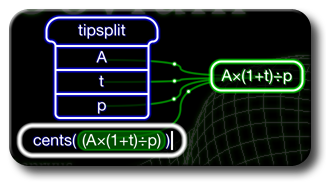 the list from the 'cus' tab input our 'cents' function. Tap our new external bubble and end with )=.
 (12d) Create a new instance bubble and input: tipsplit(35.89,.18,3)=
 (13a) Create a new mech; name it 'payment'. Add two more parameters; name the parameters A, r and n.
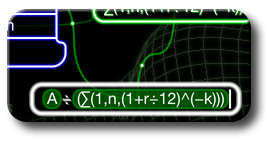 (13d) Create a new instance bubble. Divide the input amount, A by the our last instance bubble.